Learn how to import lots of contacts and send bulk SMS.
In this article:
Why importing data makes sense
For large data sets, entering contact data manually is not a sensible method anymore. For such cases we have integrated a simple solution: The import and export of CSV files.
Once created as a table, all attributes such as first name, last name, address, telephone number and birthday are transferred. You can even transfer further notes or remarks from your inventory data to the Webapp profile, process them there and export them again.
Import function
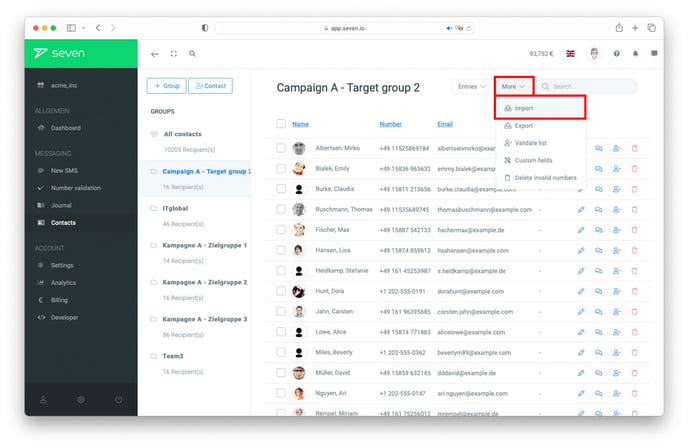
Use the "Import" function in your Account > Messaging > Contacts > More
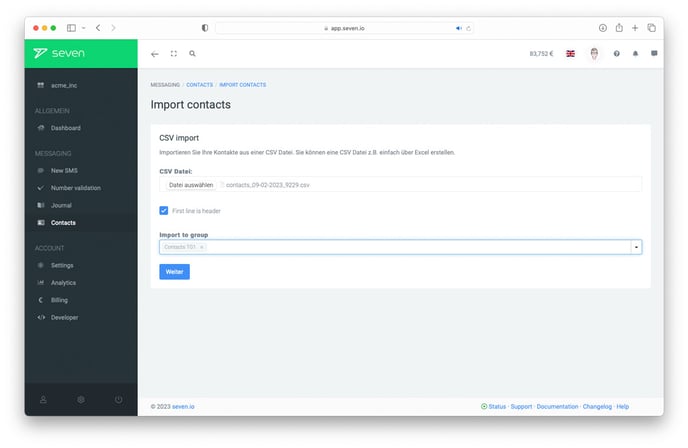
Now select the desired CSV file from the data archive on your hard disk. Please note that other file formats are not supported. However, you can create a table with the extension .csv from numerous applications, including Outlook, Office and similar programs. Usually, you have various file formats to choose from with the "Save as" function. It may also be possible to create a CSV using the "Export" function. Make sure that the name of your file is unique.
For better management, give your import a specific group name, perhaps with a date identifier, to avoid later confusion of the current data.
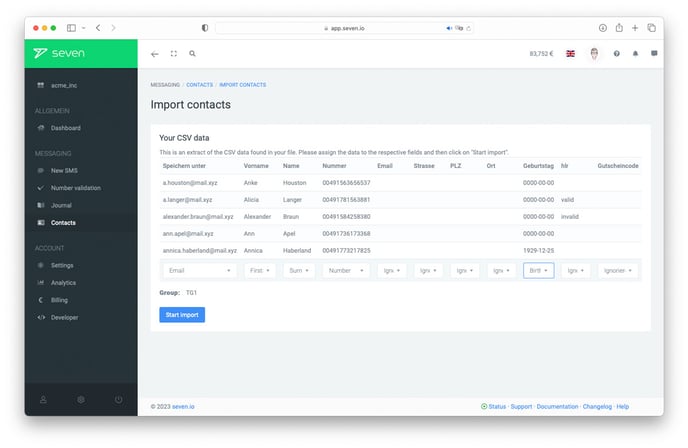
The data set is then displayed as an example. To do this, the program selects an excerpt, which you can use to check whether the columns match. Check whether the titles, names, address details, etc. have been assigned correctly. Missing or unnecessary columns can be omitted using "Ignore", incorrect assignments can (and should) be corrected. The "Save as" option is used for individual administration (for example, this could concern customer numbers, responsible sales managers, etc.).
Sending bulk SMS to groups
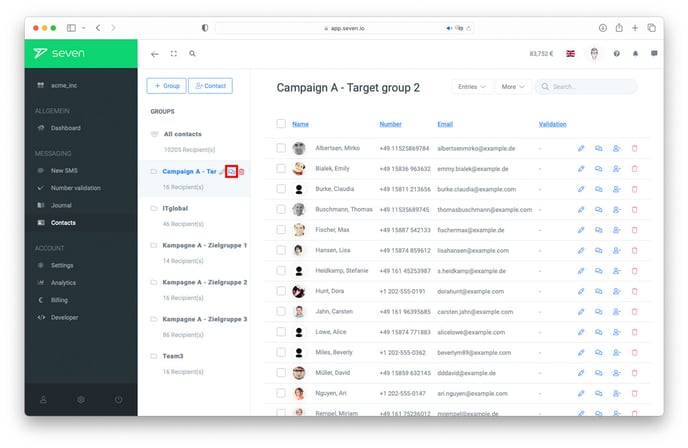
The imported contacts can be found in your Account Area > Messaging > Contacts, just as all manually entered contacts. Here you can manage, update and segment the records. In addition, you can now either send an SMS to an entire group or to individual contacts. Before you select each contact individually, it is always advisable (at least for recurring recipient lists) to create a separate group and write to the entire group. To text an entire group, use the speech bubble icon next to the respective group in the navigation.
You will be redirected to the usual "Write SMS" interface, the group will be entered as the recipient and the costs will be calculated.
On the other hand, you can of course first open the interface via the left navigation in your account > Messaging > New SMS and then select the respective group as a recipient.
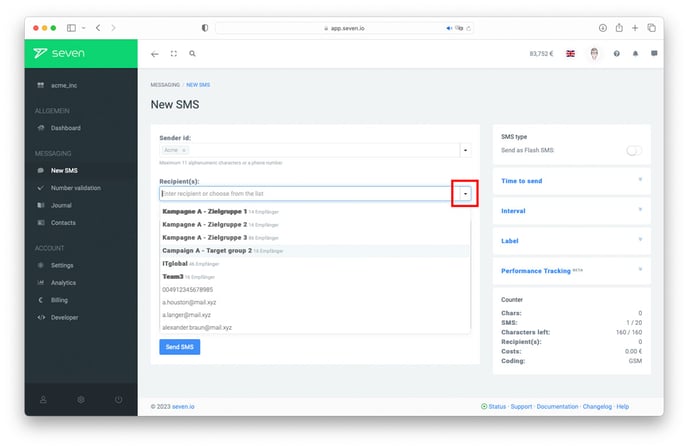
Now you can enter the content of the SMS as usual, define the sender ID and use all other functions. Our placeholders are recommended as a special feature for bulk SMS. You can choose between first name, last name, birthday and many more. Just put them at the desired position in the text. It is also possible for you to create your own placeholders by using custom fields. Please watch the video at the end of this article to learn how to create custom fields.
When sending, the program automatically replaces the placeholders with the assigned contact details. This way every recipient gets a personal message with their name, correct date of birth, etc.
More examples
You can also send bulk SMS with a time delay, set intervals to send SMS regularly or select labels. This allows you to control your campaign in a very uncomplicated way and adapt it to your individual needs.
Please also read our blog post on sending mass SMS, our article on how successful customer segmentation can be implemented and further information on the new messaging feature of the current Webapp.
Would you like to see an example? Watch our video to learn about importing contacts and custom fields. Turn on subtitles for an English version.